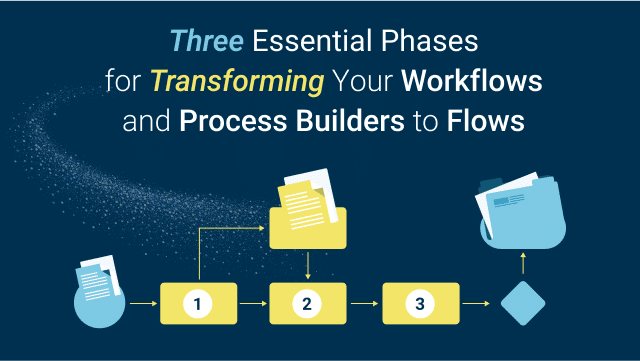

With Spring ‘23 in full swing and Summer ‘23 around the corner, it’s time to go with the flow and get serious about transforming your workflow rules and process builders into flows. Notice how we used the word transforming instead of migrating? A transformation approach acknowledges that the goal isn’t simply to “copy and paste” the existing workflow rules and process builders to flows but instead to think about the best way to recreate and refactor the automations as flows. A different automation tool requires a different approach. At first glance, this type of transformation project could seem like a daunting undertaking, and it could be confusing to know where to start. That’s why we are breaking it down into three easy phases to help you begin your automation transformation journey.
But first, let’s talk about what’s in it for you. Transforming your legacy automations into flows will give you the opportunity to reduce technical debt, enhance your automations to better meet today’s business needs, and offers a fantastic way to get your hands dirty by gaining experience designing and building flows.
Ready to dive in? Let’s get started with an overview of the three phases:
Transforming Workflows and Process Builders to Flows – Phase One: Document & Analyze
Transforming Workflows and Process Builders to Flows – Phase Two: Design & Build
Transforming Workflows and Process Builders to Flows – Phase Three: Test & Deploy
Phase One: Document & Analyze
Phase One focuses on documenting and analyzing your existing workflow rules and process builders. This essential phase will help you build a solid foundation for phases two and three. If you have existing documentation that you can use as a reference – that’s great. If not, start by documenting your existing automations. We recommend using an impact analysis tool like HappySoup’s free Workflow Migration Info tool to export a list of your workflows per object along with each workflow’s evaluation criteria, rule criteria, immediate actions and/or time-dependent actions. This list can easily be exported into a spreadsheet format that is compatible with Excel or Google Sheets. Here’s a handy reference video that walks through the export process. To extract a similar list of your existing process builders and flows, you can use the Developer Console to query the FlowDefinitionView table directly and retrieve the details you need, including ProcessType, TriggerType, IsActive, etc. Once you have your workflow, process builder, and flow details exported, you can combine this data into a single spreadsheet with one tab for each object’s automations. Now that you have an overview of your automations in one place, go through each workflow, process builder, and flow to document the business needs related to each one. This is also a good time to identify which automations are not in use and to confirm whether or not they could be deleted – let’s wave goodbye to that technical debt!
The final step of Phase One is to analyze your existing automations. This is a crucial step that will inform your design decisions. Analyze your automations by asking the following questions:
- Is the current business need the same as when the automation was originally built?
- If not, what is different?
- Are there opportunities to optimize the build of the new flow to meet the current business need?
- Do you have existing workflows and process builders that have the same entry criteria?
- If so, are there opportunities to consolidate a few workflows and processes into a single flow?
- Think in the context of the Flow Trigger Explorer – how many Before Save, After Save, and Before Delete flows will you have per object?
As you ask your questions about each existing automation, add your analysis notes to your spreadsheet. These notes will be invaluable as we move into the next step.
Phase Two: Design & Build
We’ve done a lot of work so far, and you might wonder, “Why can’t I just start building?” First off, we want to make sure you build the right thing. Rather than spend time building a flow only to find out that you need to scrap the elements on the Flow canvas and rebuild, taking time to design the flow will help you quickly see and assess any design concerns or flaws before building. Design your flows by mapping them out using a diagramming tool like Diagrams.net, Lucidchart, or Visio. When Designing your flows, take a time travel approach and design to be kind to your future self. Focus on designing flows that will be easy to understand, maintain, and make changes to in future. Design with error handling in mind – will you have an error handling path or an error handling subflow? Keep Salesforce’s Order of Execution and Flow Limits and Considerations in mind as you design.
Equipped with your documentation, analysis, airtight designs and flow diagrams, the moment has come when you can begin to build. Salesforce Tool for Migrating Workflows to Flows is a good starting point. It can convert most existing workflows into flows. However, once this is done, make sure to check the created flows by following the best practices below:
- Build and test your flows in a sandbox, not in production
- Use naming conventions that make it easy to understand the business logic of the flow.
- Fill in the description for each flow and be sure to include the business need the flow addresses, where it’s invoked, the objects it touches, and even url links to your flow design diagram and documentation.
- To reduce the risk of hitting governor limits, never perform DML statements in Loops.
- Never hardcode IDs in Flows, as the IDs may change between Salesforce environments. Instead, use Custom Settings, Custom Metadata, Custom Labels, or Get Records.
- Define the Run Order for record-triggered flows.
Whoa! Give yourself a pat on the back and a sprinkle of Trailblazer confetti for completing the first two phases.
Phase Three: Test & Deploy
Welcome to Phase Three: Test & Deploy. Here’s where the rubber meets the road. This phase is crucial to ensure that your flows are functioning as intended and to ensure a smooth transition from your legacy automations to flows. Start by writing Test Cases that outline what needs to be tested and the expected behaviour for each flow. Test your flows thoroughly to ensure that they are functioning as expected. It is essential that your test cases should cover each path the flow can take, including fault paths. Use test data and run through various scenarios to ensure that all possible permutations of the flow are working correctly.
Before activating your flow, you can test it using the debug tool. If your debug is successful, you will also have the option to convert the debug run to a Flow Test by clicking “Convert to Test”. We also recommend logging in as a user with the appropriate profile and permissions and completing end-to-end tests of your business processes to ensure that your existing functionalities work as expected.
Once you have thoroughly tested your flows in a sandbox or Developer Edition org, it’s time to deploy them to your production org. If you have DevOps Center configured in your org, you can use it to deploy. If not, you can deploy via change sets and check out DevOps Center when you have time. We recommend a gradual approach to deploying flows. Rather than deploying and activating multiple flows at once, focus on deploying one or two flows at a time, starting with flows that relate to your core business needs. deactivate the legacy workflow rules and process builders being replaced by the new flow before activating your new flows. Keep in mind any dependencies that may exist between your flows and existing configuration.
After your flows are deployed to your production org, it’s important to monitor their performance to ensure they are running smoothly and meeting your business needs. One way to do this is by setting up Flow Monitoring to track the performance of your flows and to receive alerts if any errors occur.
Congratulations! You did it! By following these three phases, you transformed your legacy automations into brand-new shiny flows! We recommend that you continue monitoring and fine-tuning your flows to ensure they continue to meet your needs as your business evolves.
Have any questions? Want to chat about Flows? Need some help with transforming your own Workflows and Process Builders? Get in touch! We love this stuff and would be happy to discuss with you to see how we can help.