Guide
Salesforce DevOps Center – Getting Started Guide
The Salesforce DevOps Center is a new offering from Salesforce that makes it easier for Devs and Admins to build, test, and deploy solutions across Salesforce. This blog gives a great overview of its features and benefits. So… how do you actually get started using DevOps Center?
Well, our team has put together a little guide for you. Follow along with the steps below, or grab the PDF download to share with your team.
Enable DevOps Center
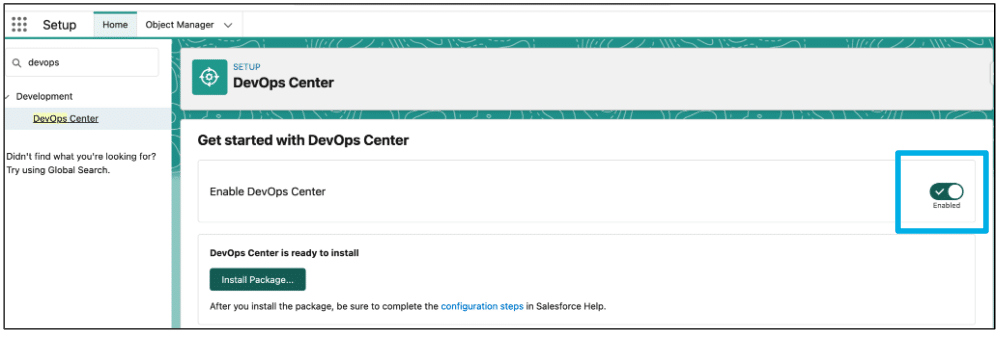
1. Go to setup and search for DevOps Center and toggle Enable button and Install required managed package to start using DevOps Center.
Install Managed Package
2. Once DevOps Center is enabled, there is button on the same page to Install Package. It is a managed package offered by Salesforce which is mandatory to have. Note that installation may take a few minutes to complete.
Create Connected App
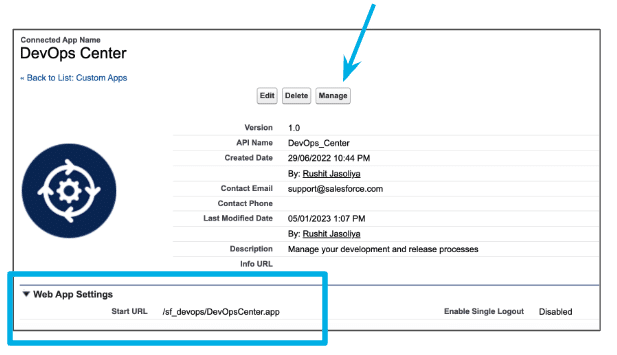
3. Create new Connected App from the App Manager and set the start URL as link of DevOps Center app
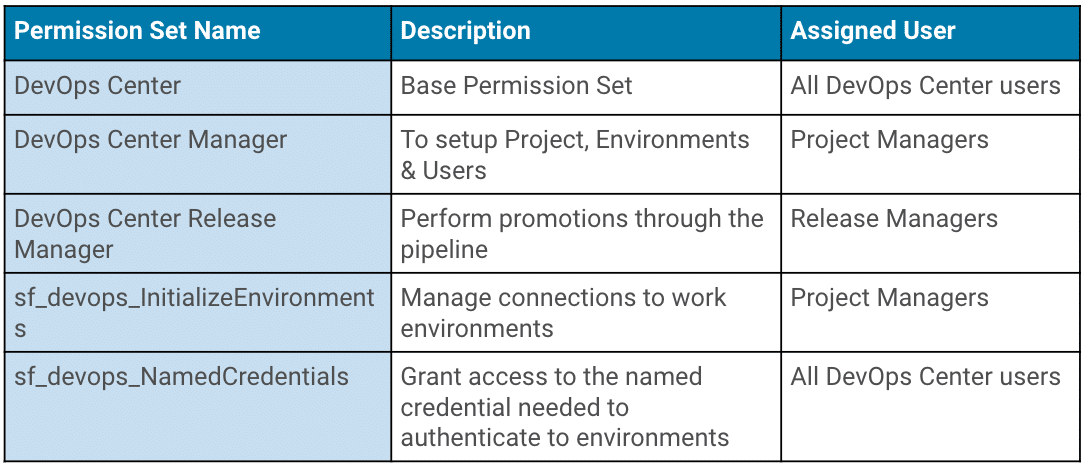
4. Once created, assign permission set to this newly created Connected App by clicking on Manage button
5. Scroll down to permission set section and assign sf_devops_NamedCredentials permission set
Permission Set Assignment
6. Upon completion of the above. steps, DevOps center should be ready to use.
Create Project in DevOps Center
7. From App Launcher, search for DevOps Center and Launch the App. On Top Right corner there will be New Project button to set up new project. All Projects in Org will be visible on this screen (note: As of March 2023, there is no filter criteria available yet for the list view)

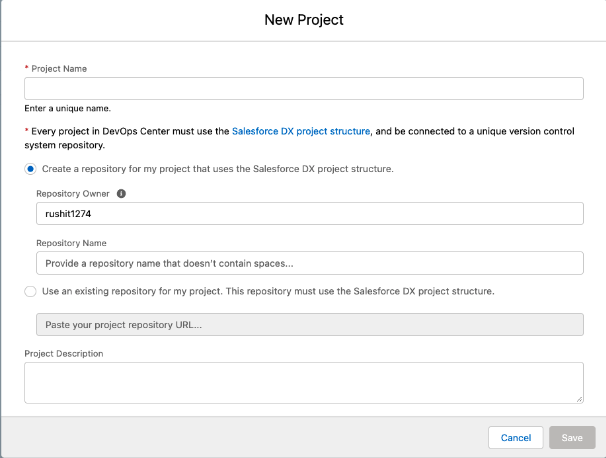
8. The first time a new project is created, GitHub authentication must be completed
9. Other required details are Project Name, Repository Name (New/Existing), Project Description. Note that in the current version, there is no way to hide or delete projects, so avoid creating unnecessary/test projects as much as possible
Add New Environments
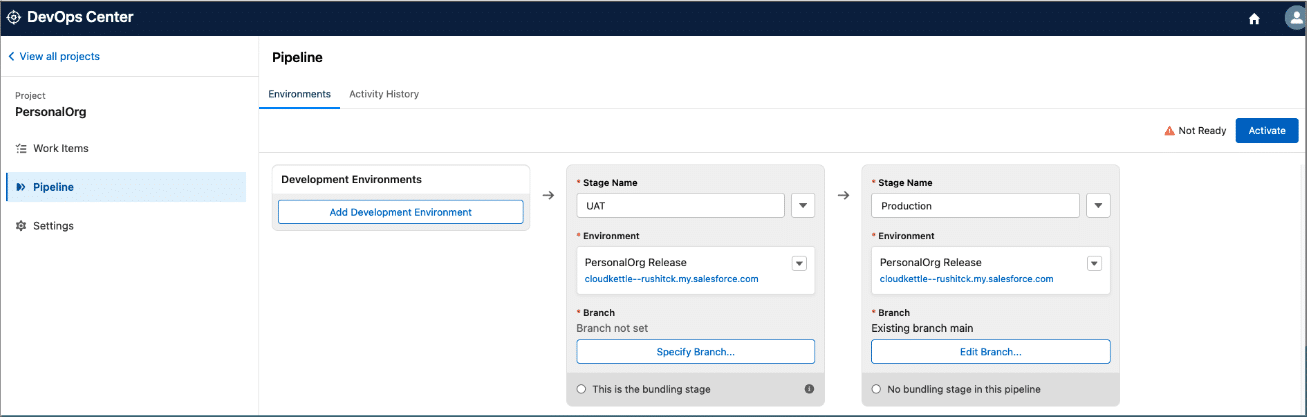
10. The next step is to add environments in the pipeline. Multiple Development Environments can be added, and there should be at least one stage after Deployment Environments
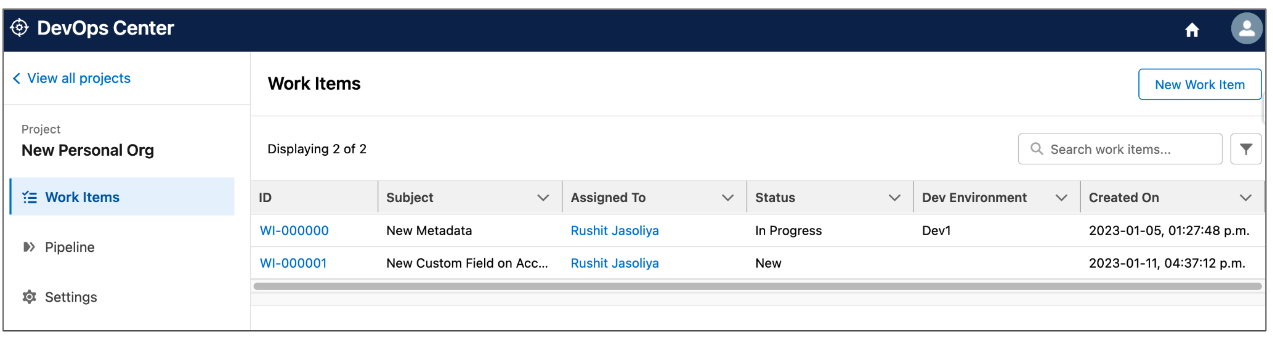
List of Work Items
11. The DevOps Center has the same interface as list view for Work Item list, but it doesn’t have list view actions. Also note that you can’t delete a Work Item once created
12. Navigate to Work Item tab on the left panel and click on New Work Item button to create a new record.
Creating a new Work Item
13. The Work Item only has three fields in the current version, and can be used as a User story

Work Item Stages
14. On New stage, you need to specify where you are going to work:
- from Salesforce platform then you’ll select Development Environment that you connected earlier OR
- from external IDEs where you will develop and then push changes in feature branch
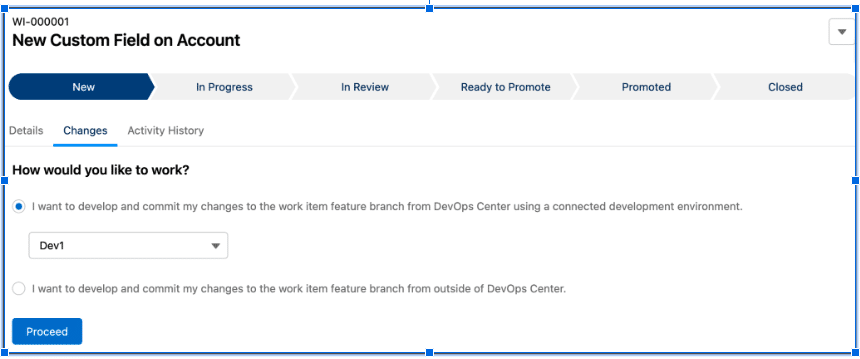
Note that Feature branch gets created automatically with same name as Work Item.
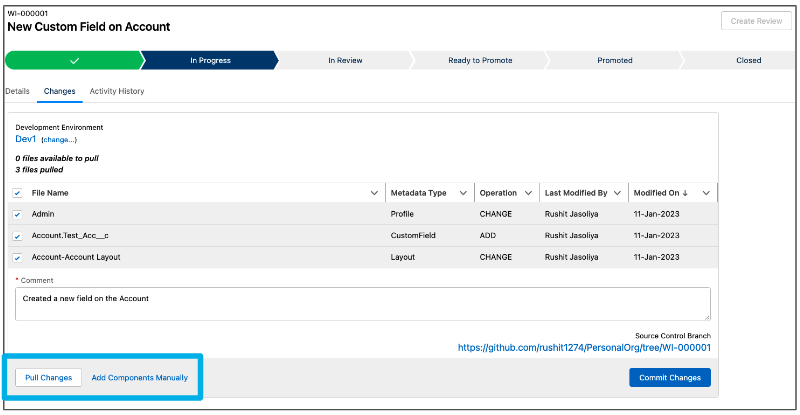
New Custom Field on Account
15. To add metadata changes to Work Item, there are 2 options:
- Pull Changes button – it will pull all the modified changes from the development environment
- Add Components Manually – you can select components manually to add to Work Item
Create Review
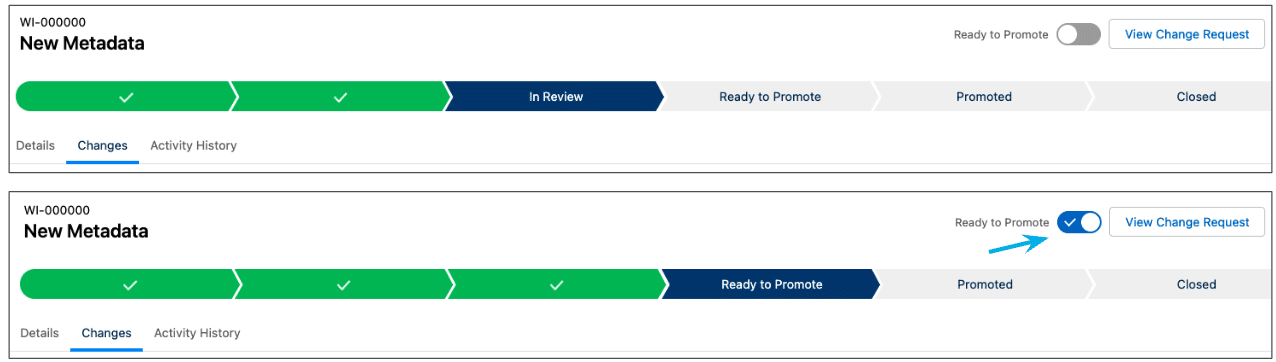
16. After metadata component is committed, the Create Review button is enabled in the top right corner. On click of Create Review, the Work Item moves in to In Review stage. In the back-end, a pull request is created.

Pipeline Promotion
17. After creating a pull request, it can be marked as Ready to Promote. This will make the Work Item available to promote to the next environment in the pipeline.
Promote the Work Item
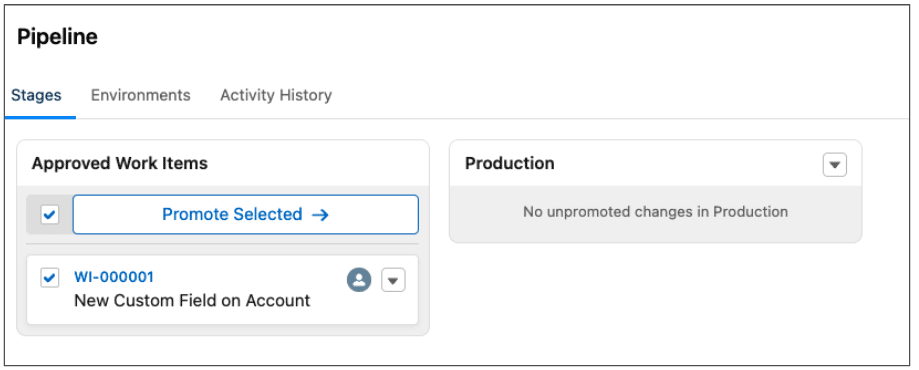
18. The last step is to Promote the Work Item. Multiple Work Items can be bundled in a single promotion and moved to the next environment.
Closed Stage
19. Once successfully promoted, Work Item will automatically move to Closed stage.
A few final notes:
- This is a new tool, and additional features are still in development
- Currently the only supported provider is Github. (Bitbucket, Azure & Gitlab will be available in the near future, but no firm dates yet)
- DevOps Center is not supported in Classic Environments
- Integration with ticketing systems like Jira/Azure not yet possible
- There is a GitHub RoadMap for Salesforce DevOps Center
- Even with somewhat limited functionality, DevOps Center marks a massive improvement over Change Sets
eBook
Data Architecture Principles for Salesforce Marketing Cloud
Proper data architecture helps ensure that your data is secure, accessible, available, and can be […]
Download NowTemplate
5 Free Account Engagement Landing Page Templates
Kick it off your next campaign these simple and reusable templates for user-friendly Landing Pages. […]
Download NowSign up for the latest tips & news from CloudKettle